


Required Time

Around 1 hour
約一小時
Required Materials and Tools


Optional Tools

Cardboard tube & Seam ripper
廁紙筒 & 拆線刀
︎ You may like to learn by watching a instructional video.︎ ︎You can find the video in the end of this page.︎ ︎最底有影片︎

Step 1
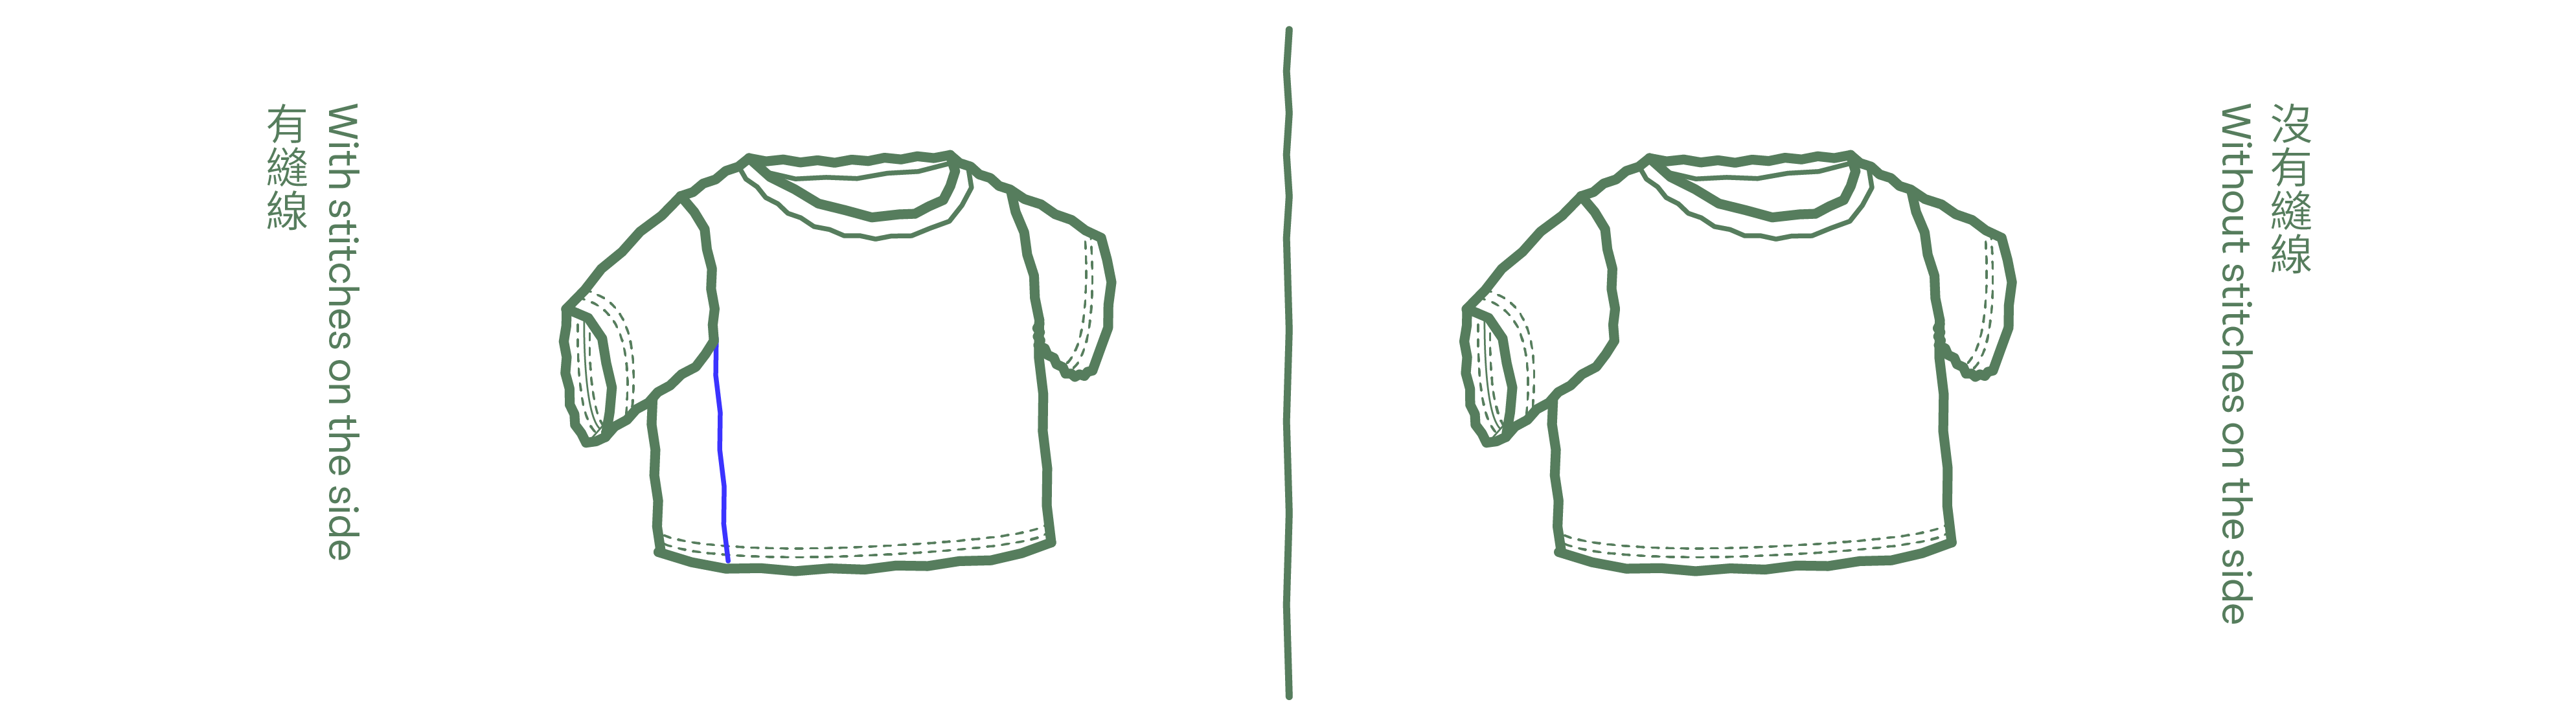
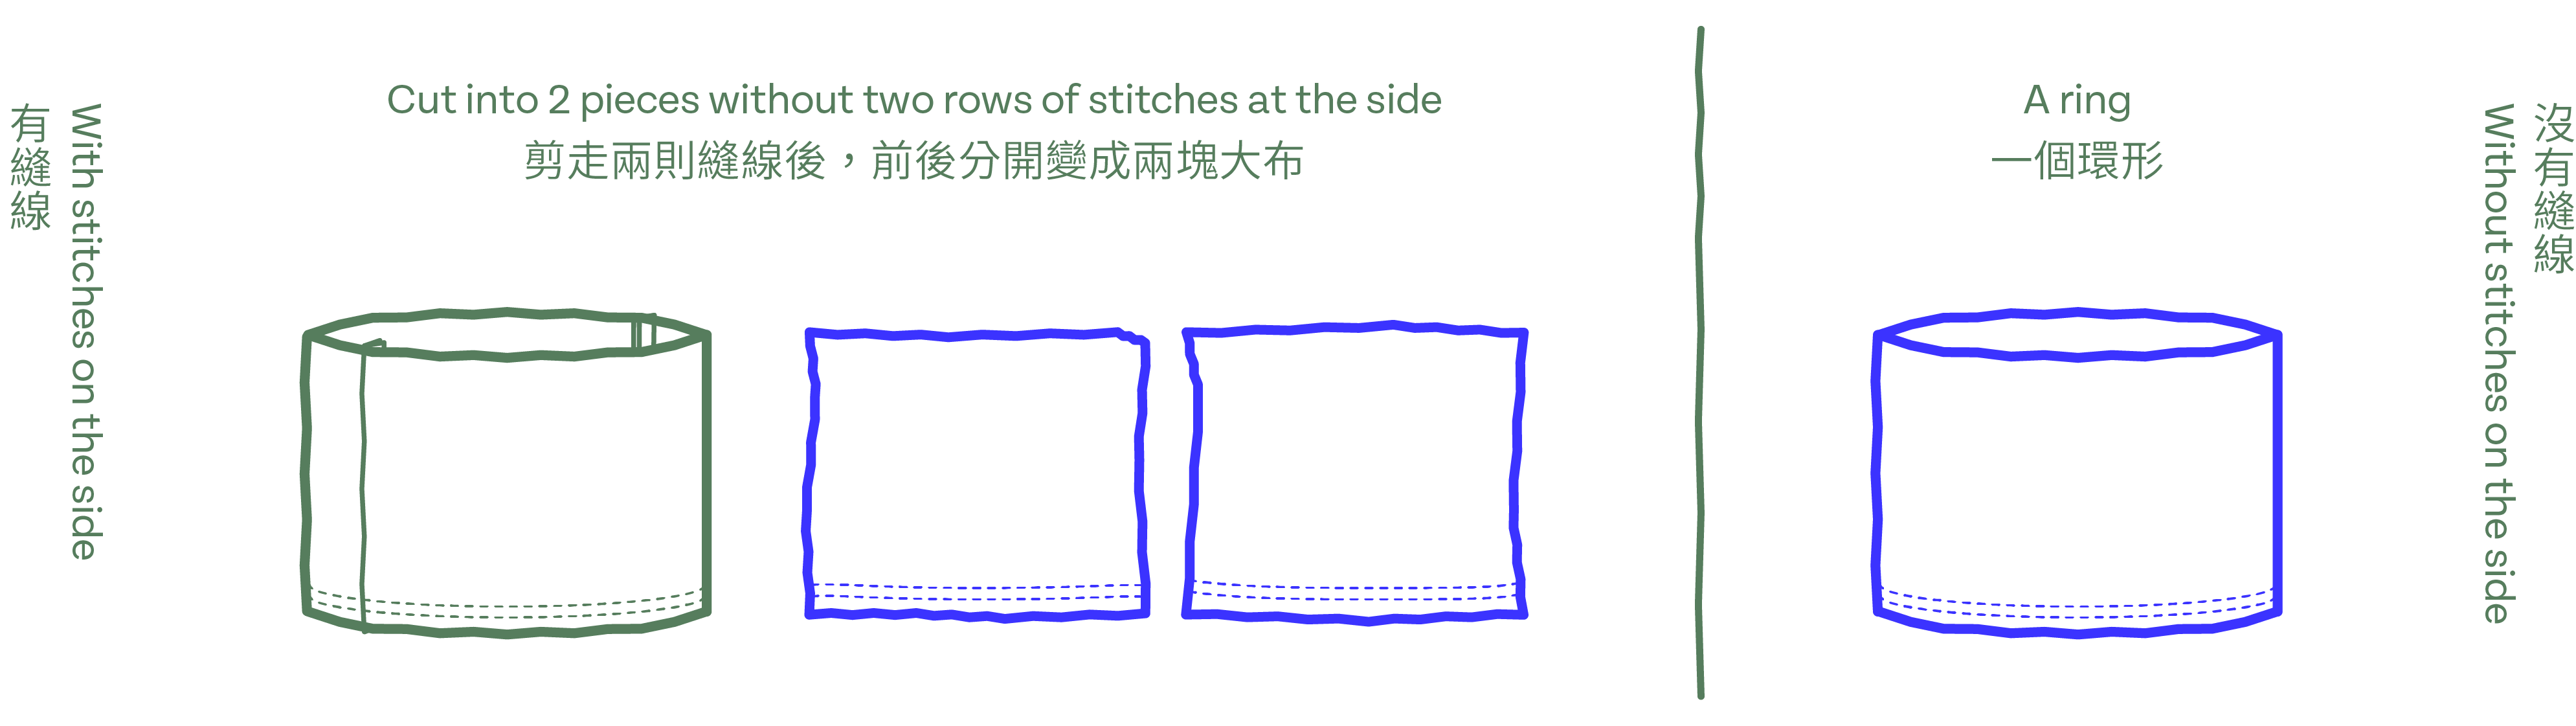
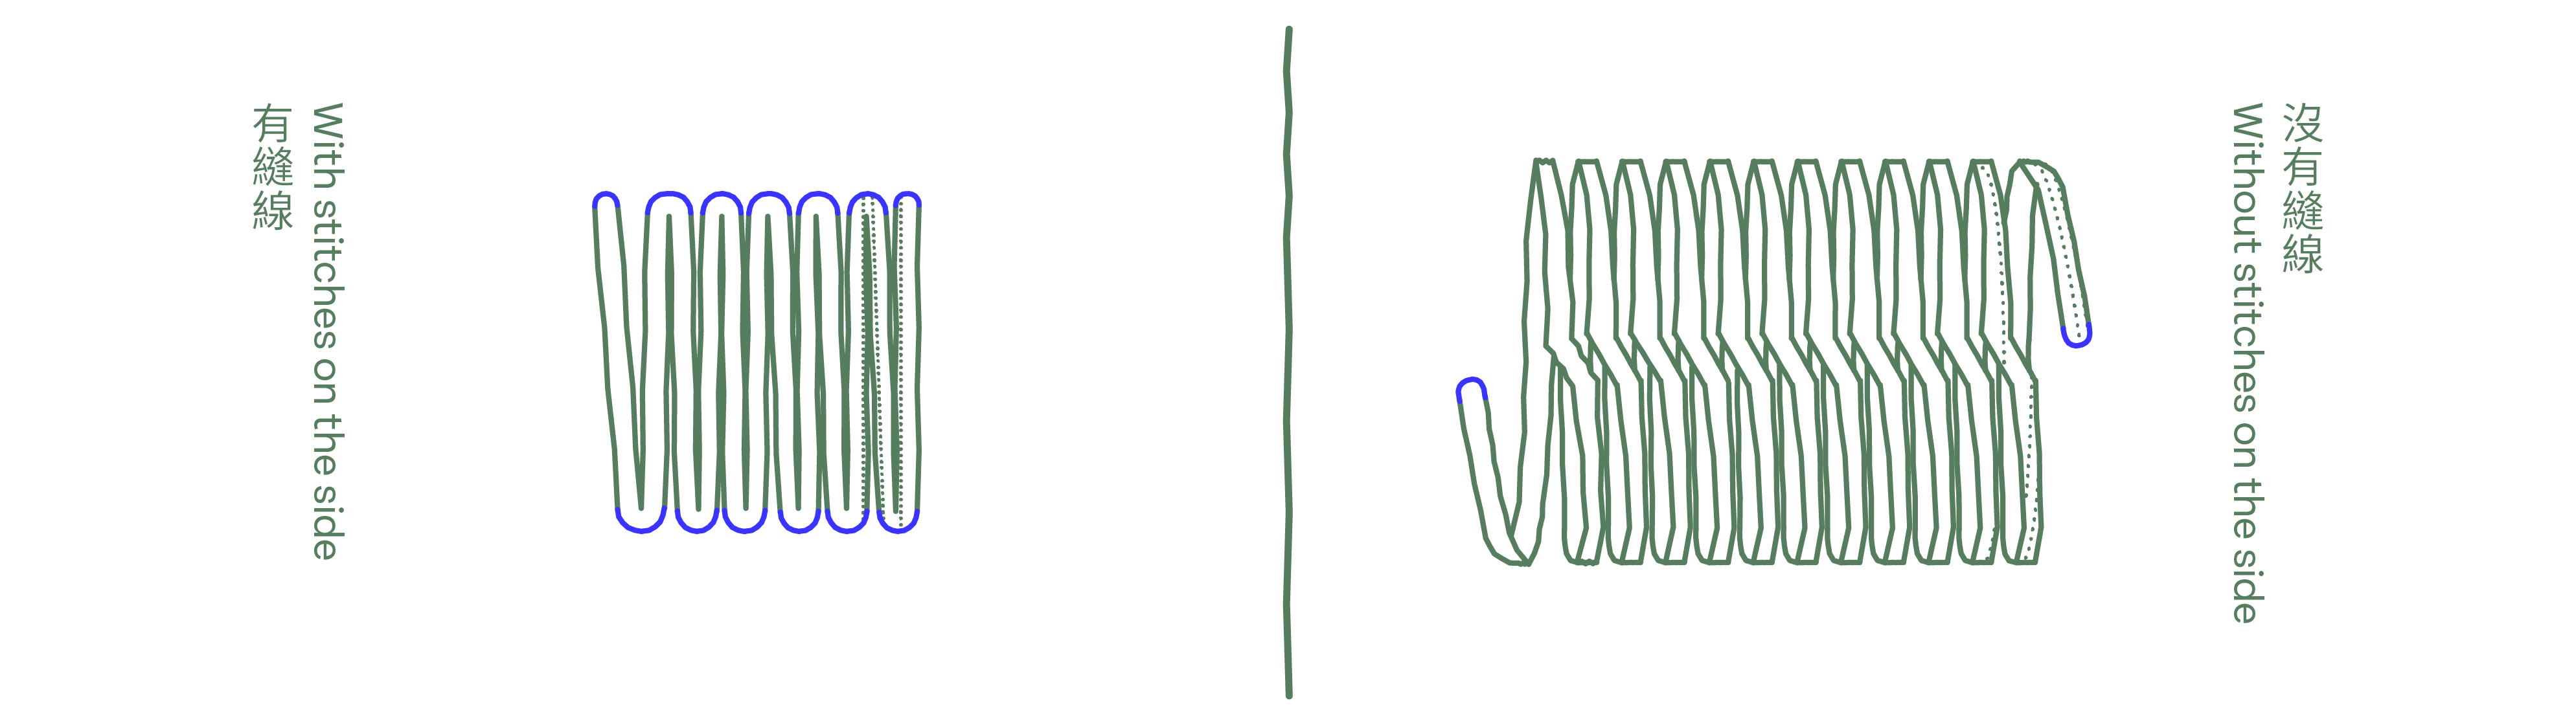
Observe the side of the clothes
![]()

There may be stitches on both sides of the shirt.
衫身兩則可能會有縫線。
Step 2
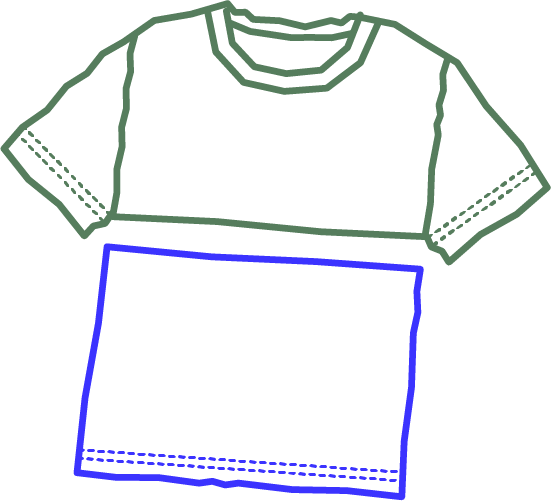
Cut the body part of the clothes

Cut right below the sleeves. If there is prints on the clothes, cut below the logo.
在䄂下的位置剪。如果有圖案印在衣服上的話,便避開圖案剪。
Step 3
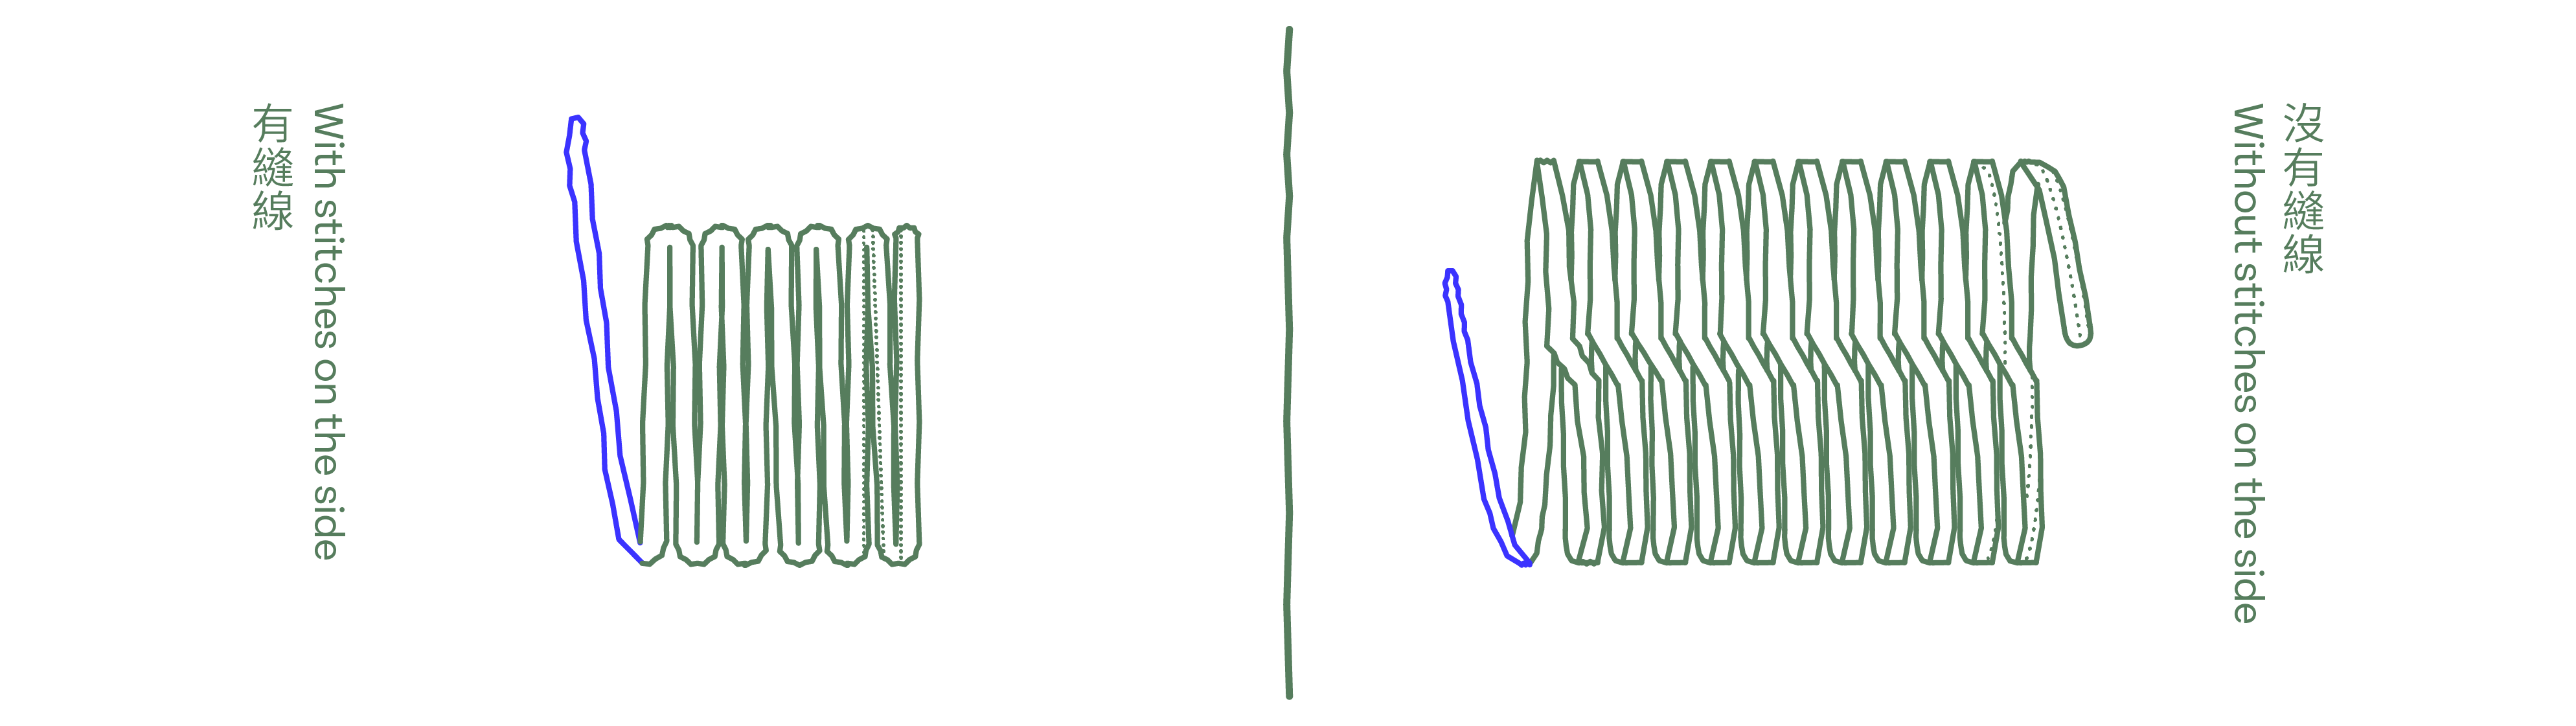
Remove the stitches of the bottom hem
![]()

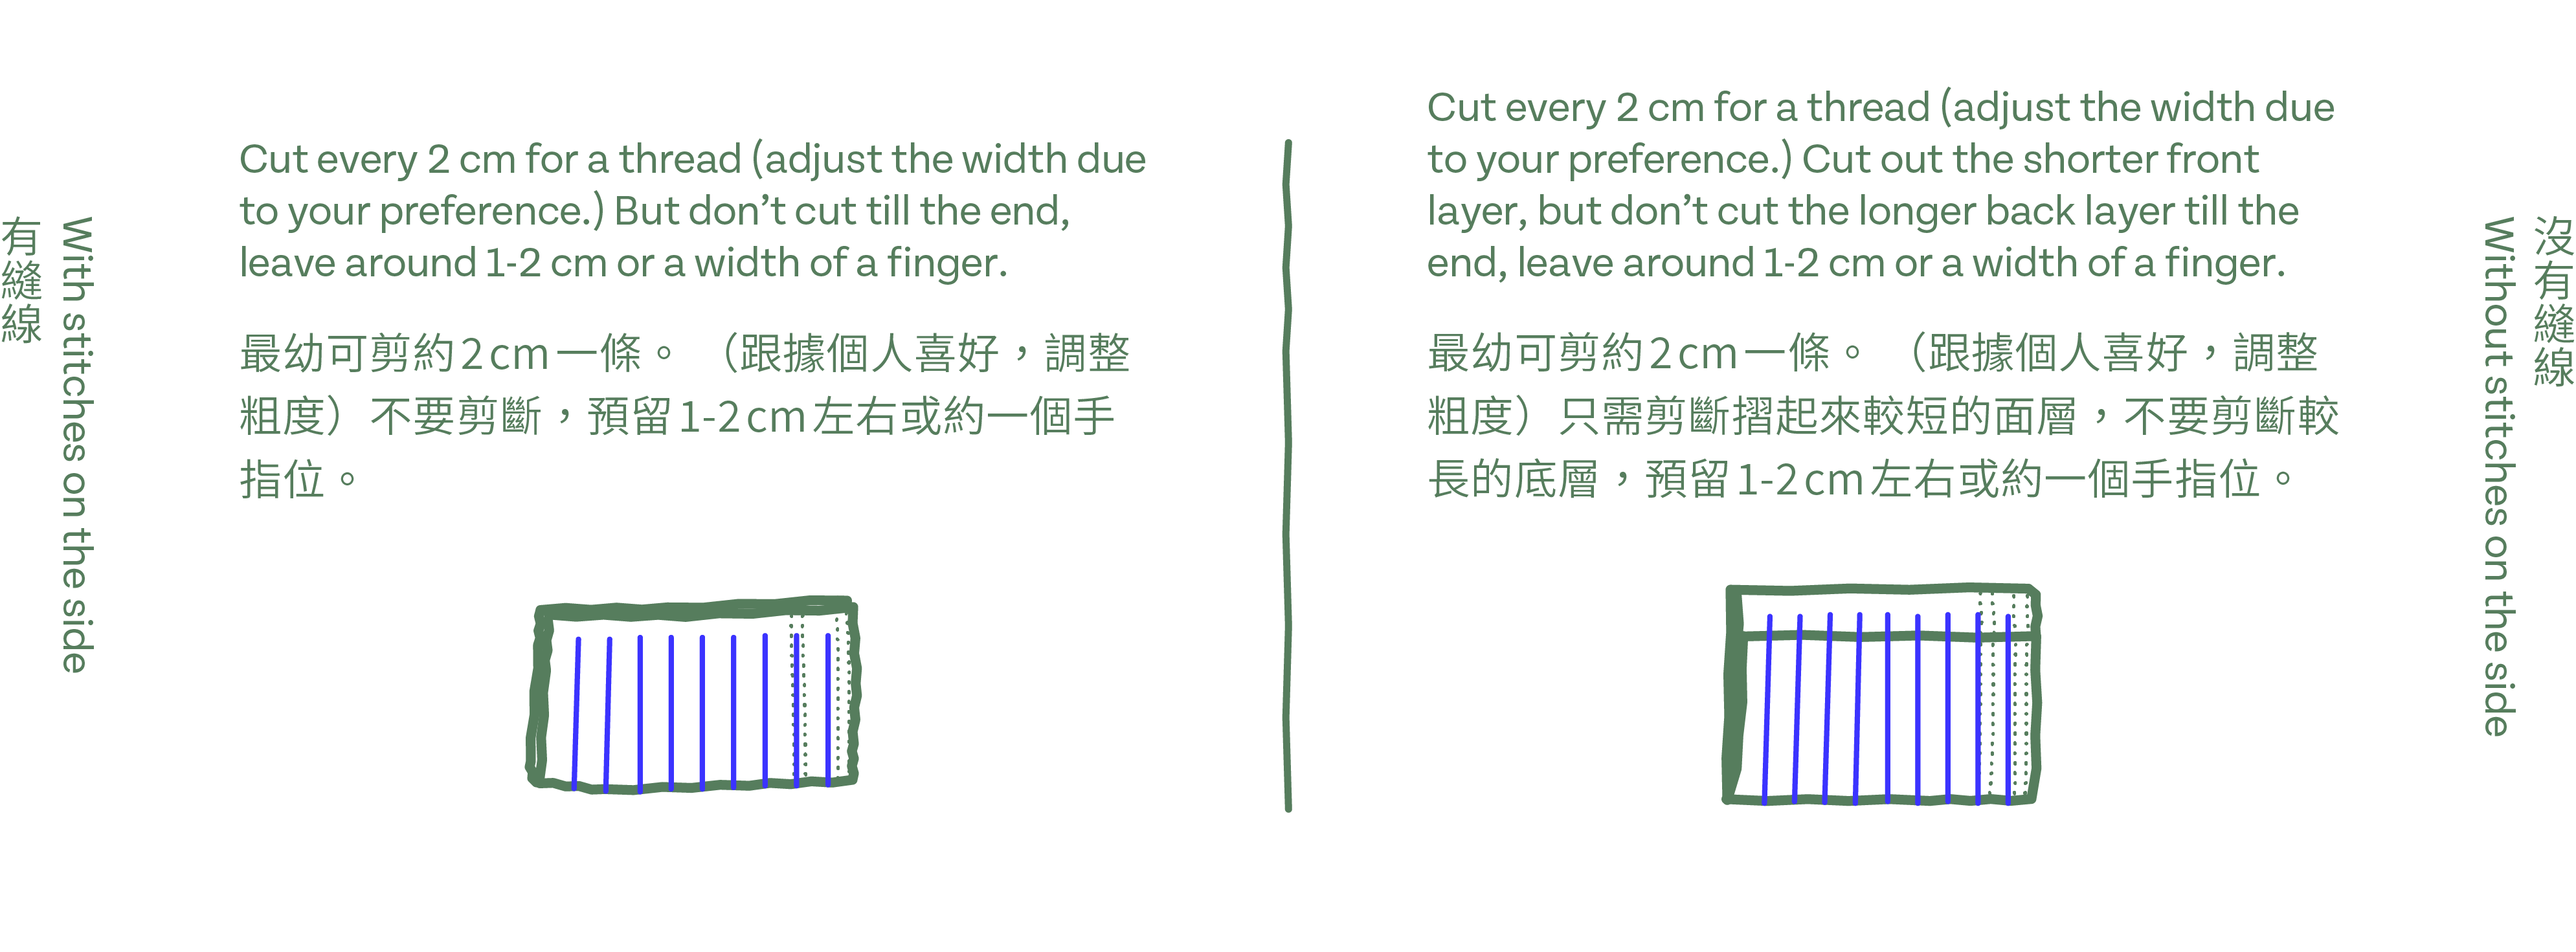
Every stitches can be removed, so to get more fabrics and also reduce the waste. The stitches part can also be trimmed directly, so to save time and be more efficient.
所有縫線也可以慢慢解開,從而得到更多的布料。但有的人會因為效率的關係,而直接把整個部分剪走。


Step 4
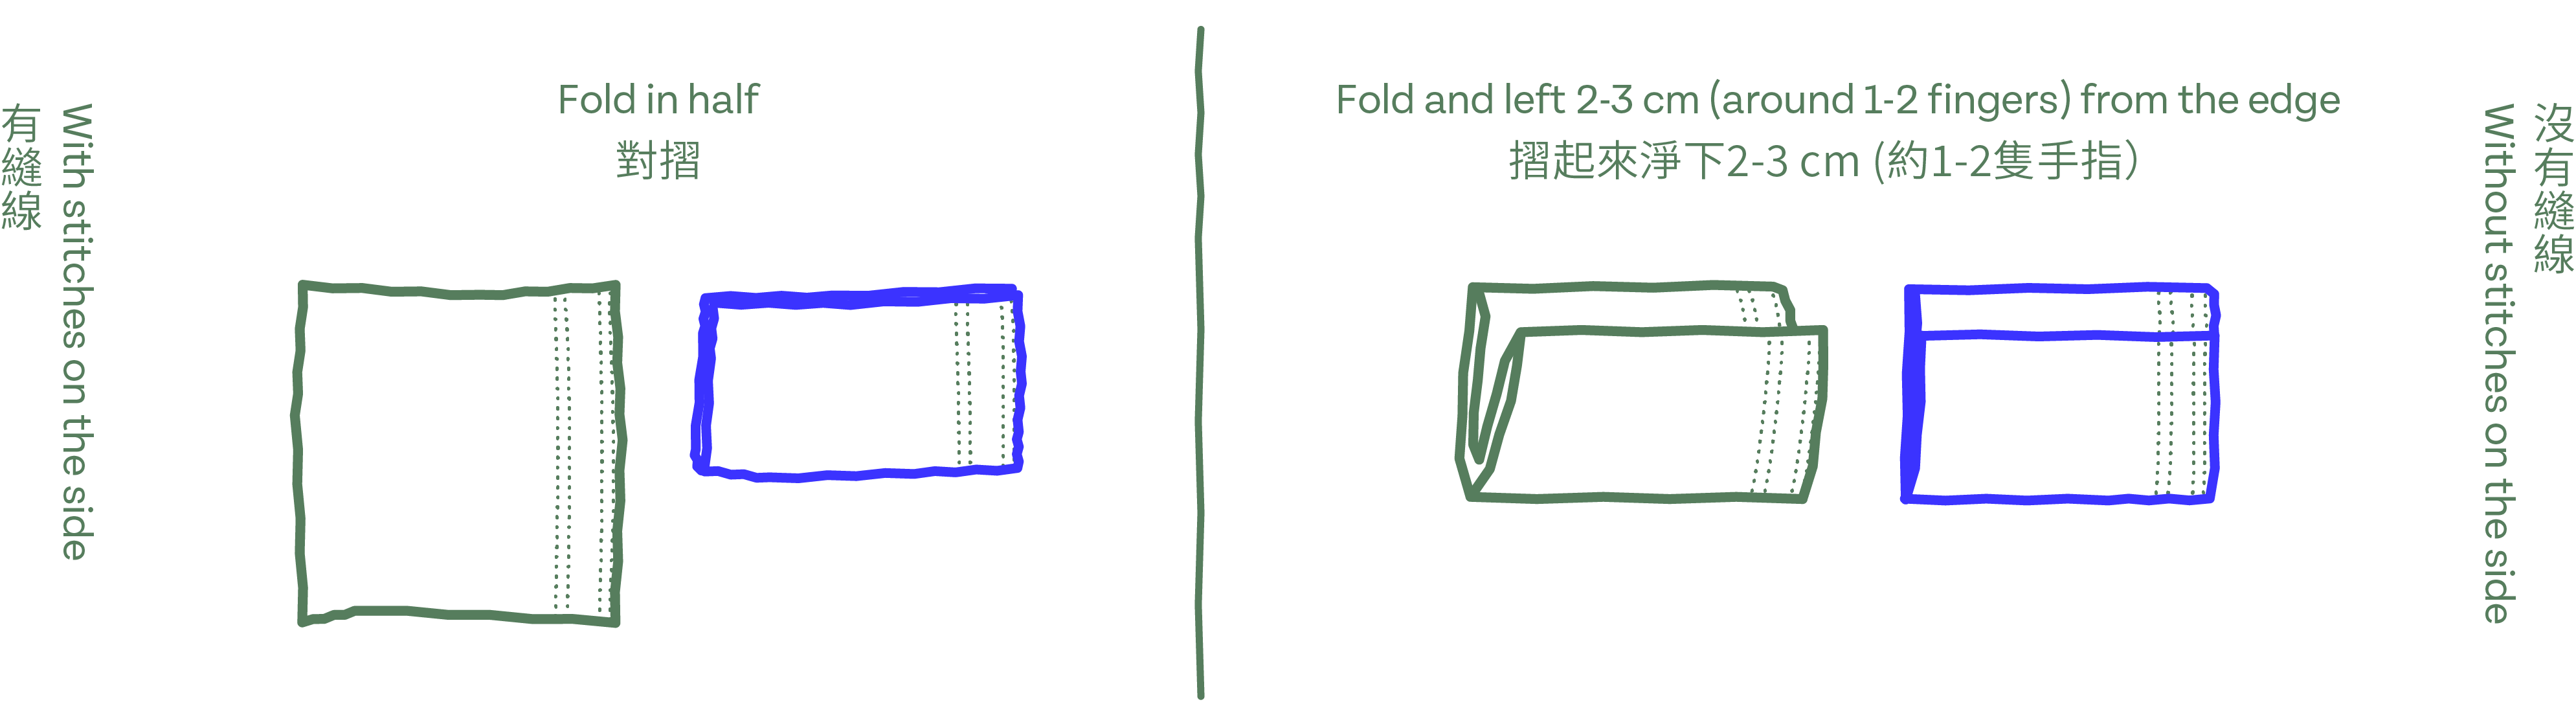
Fold before cutting
![]()

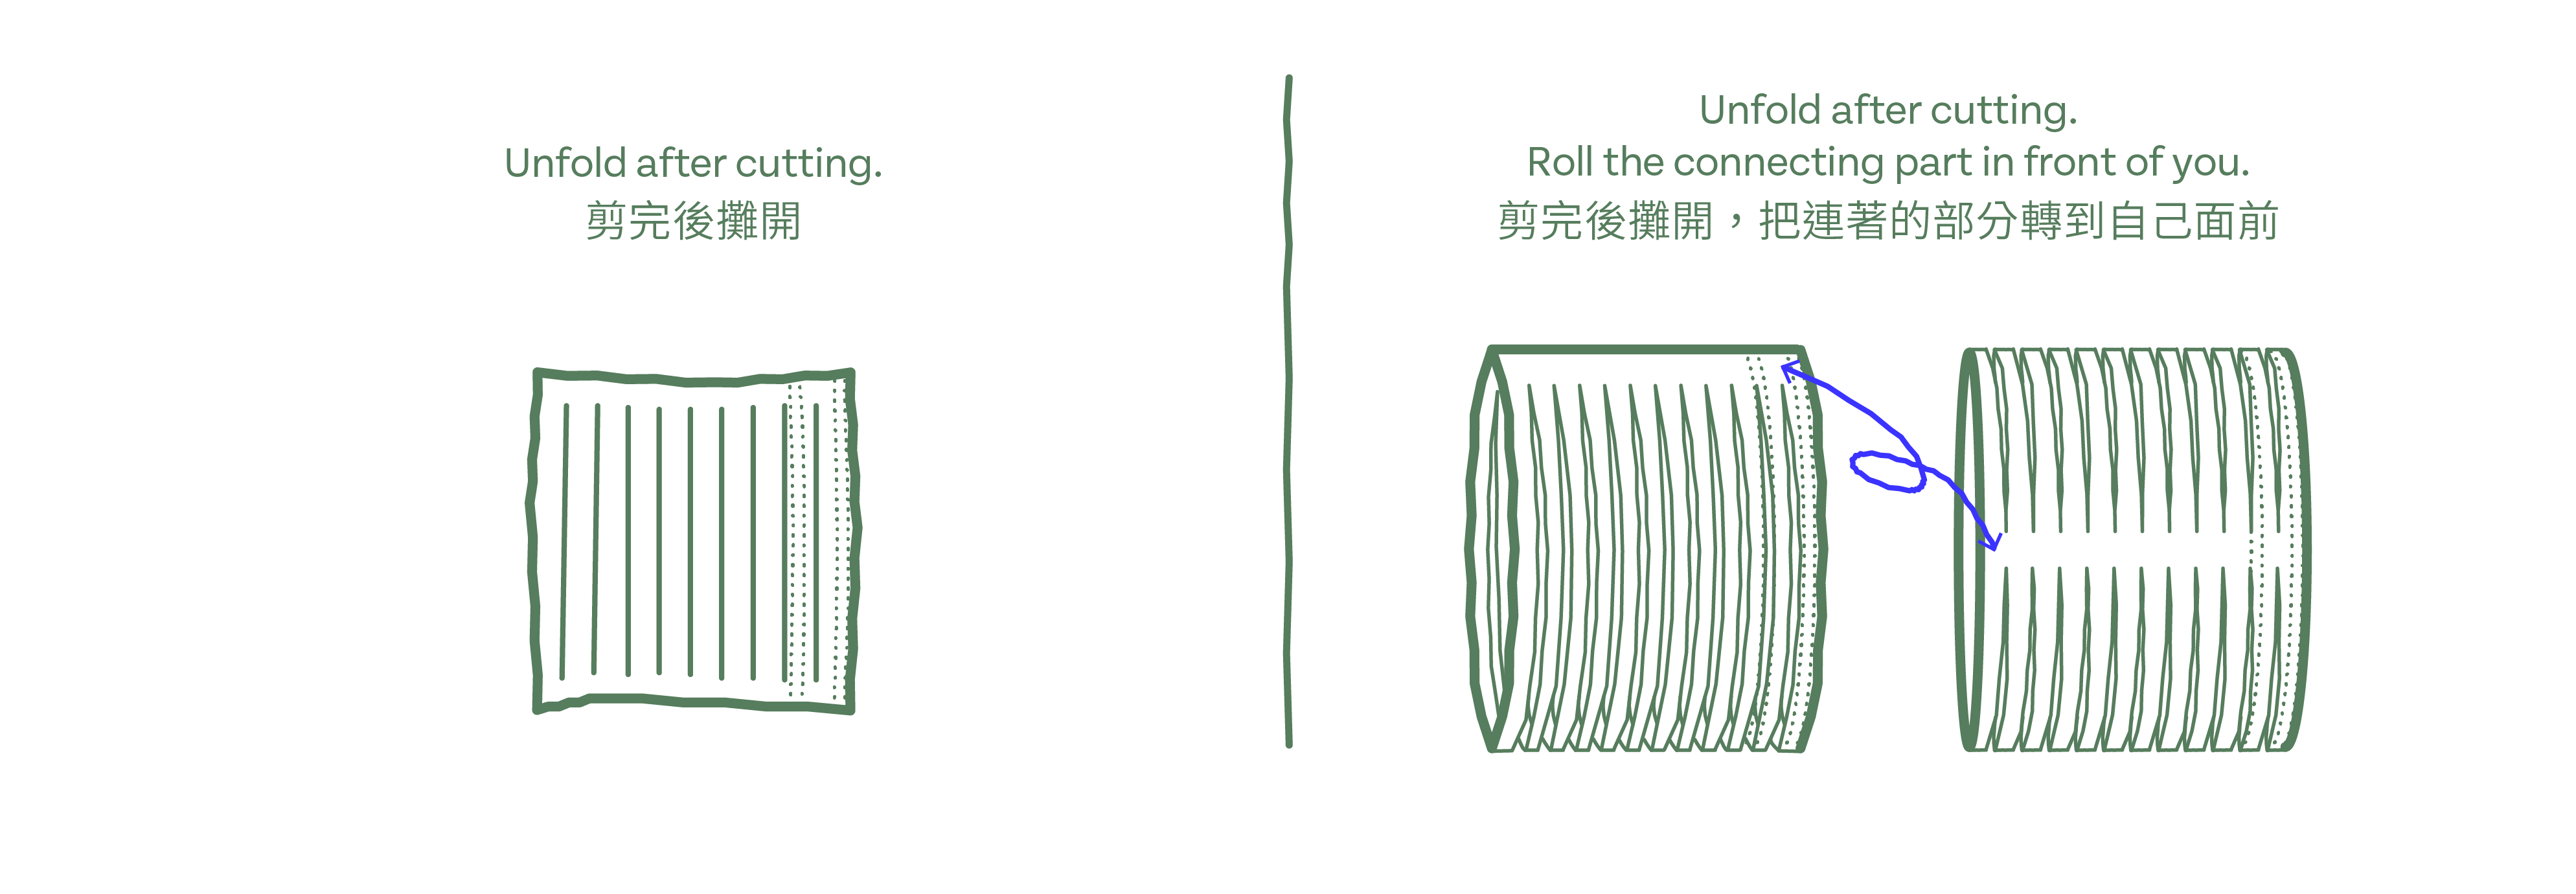
It will be more efficient to cut when the fabrics are folded.
摺起來剪更有效率。
Step 5
Cut into a thread
![]()
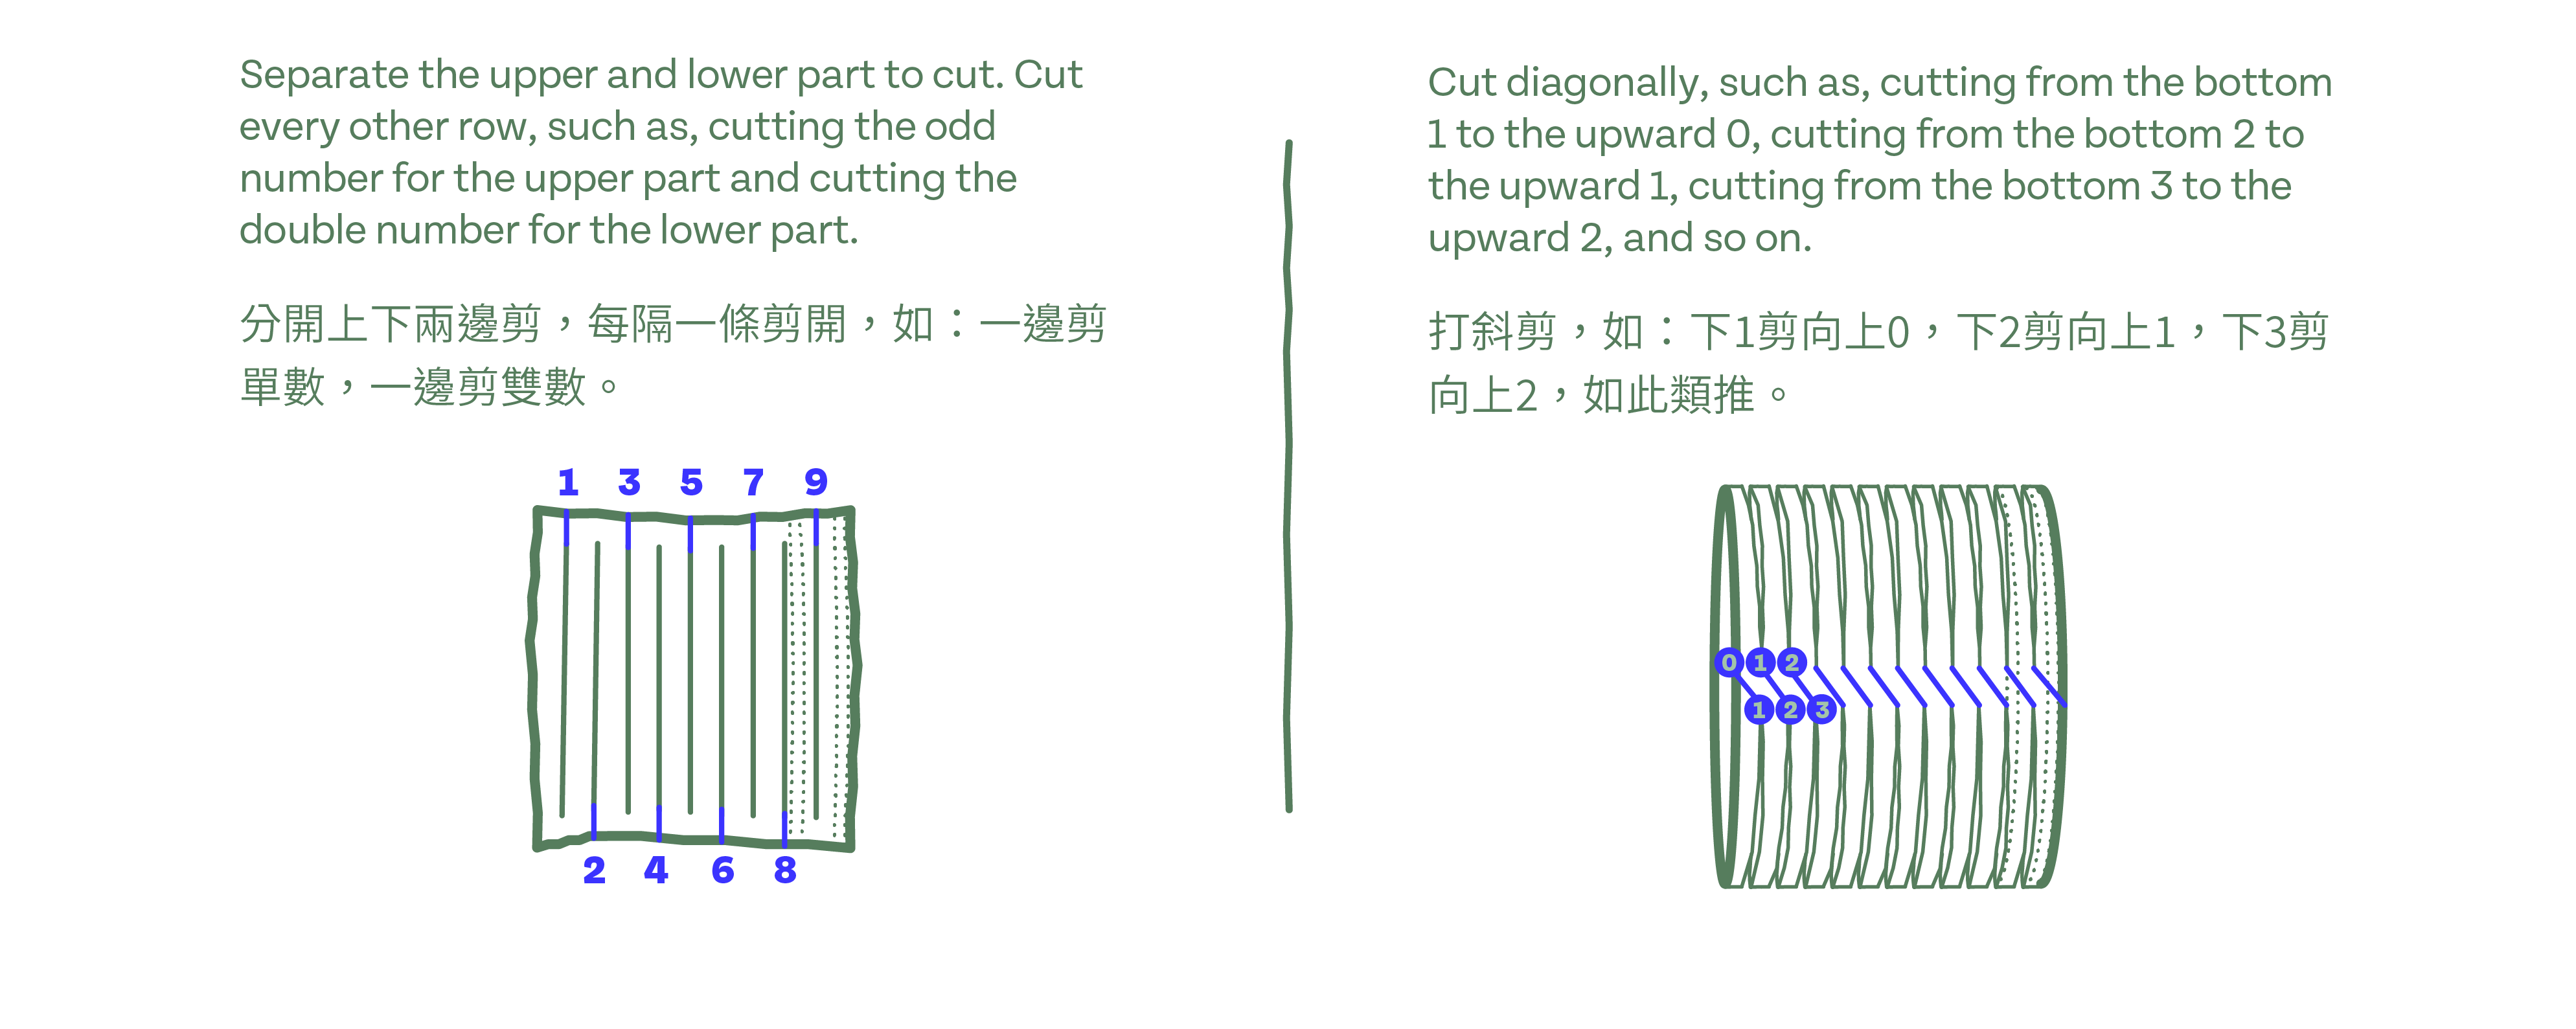
Please pay attention to the cutting direction.
請注意剪的方向。
Step 6
Trim the corners to a round shape
![]()
Each corner is trimmed into rounded corners to make the finished product looks better.
每個角位修剪成圓角,可令編織的成品更美觀。
Step 7
Stretch all the threads
![]()
Stretch the threads softly and they will roll up and become slightly longer.
綿的質料只要輕力一拉,它們便會自動捲起來,亦會輕微變長。
Step 8
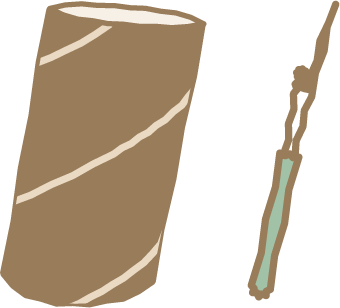
Roll into a yarn ball
![]()

Roll them into a yarn ball with a cardboard tube. It will be more easy to store and use afterwards.
可用廁紙筒將它們捲成一個冷球,方便以後儲放和使用。
The other steps for the left of the clothes are actually similar to the steps above.
If you would like to watch the whole steps, please check on the video below.
剪衣服的其他部分其實也是大同小異的步驟。如想看怎樣剪衣服的其他部分,請查看以下影片。
If you would like to watch the whole steps, please check on the video below.
剪衣服的其他部分其實也是大同小異的步驟。如想看怎樣剪衣服的其他部分,請查看以下影片。
Please take the instruction above as a reference.
Freely to make changes based on different kind of clothes and fabrics.
以上的步驟請當作參考。因應不同情況的衣物或布料可作不同調整。
Freely to make changes based on different kind of clothes and fabrics.
以上的步驟請當作參考。因應不同情況的衣物或布料可作不同調整。